Theralytics can store a client's Social Security Number for billing and EVV while keeping it protected on screen. The SSN is masked by default, is revealed only when you deliberately choose to, and appears on the Client Details report only for the roles you've given permission — so the information is there when you need it without being exposed to everyone.
Adding or Editing a Client's SSN
Go to Manage Clients --> Add/Edit Client and open the Demographic Info screen.
Enter the number in the SSN field (next to the eye icon). It's optional, but when entered it must follow these rules:
Numbers only, exactly 9 digits.
Dashes are added automatically after the third and fifth digits as you type (for example, 123-45-6789).
The SSN must be unique — entering one already on another client shows "SSN already exists."
If you enter fewer than 9 digits and click away, the value is masked and you'll see "SSN should be a 9 digit number."
For privacy, the field turns off browser autofill and doesn't allow copy-paste.
When editing a client, the existing SSN is pre-filled. To remove it, clear the field and save.

Picture 1:Add/Edit Client — Demographic Info SSN field with the eye icon
Showing and Hiding the SSN (Eye Icon)
Add Client: the eye icon starts open, so the SSN is visible as you type. When you click out of the field, it's masked with asterisks and the icon switches to closed.
Edit Client: the eye icon starts closed and the SSN stays hidden until you choose to reveal it.
Click the closed eye to reveal the SSN; click the open eye to mask it again.
Where the SSN Appears
The SSN is no longer shown on the Client Profile Summary — it lives only on the Demographic Info screen and, with permission, the Client Details report.
Editing a client's SSN is recorded in the audit log (Logs --> Audit Logs) as a Modify on the SSN field; for privacy, the Old Value and New Value are left blank.
Showing the SSN on the Client Details Report
A role permission controls whether the SSN appears on the Client Details report.
Go to Masters --> Role Permission, select the role, then open Reports --> Staff And Client Management --> Client Details.
Enable Client Details – Show SSN Column and save.
For roles that have it, generate the report at Reports --> Staff And Client Management --> Client Details. An SSN column appears between Client Internal Notes and Date Added, showing the full 9-digit number, and it's included in every export.
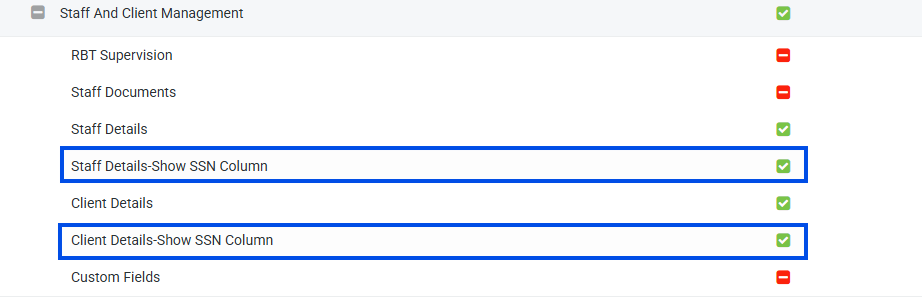
Picture 2: Client/Staff Details – Show SSN Column" permission and the SSN column on the report
Notes:
Client Details – Show SSN Column works as a child of the Client Details permission: turning it on automatically turns on Client Details, and turning Client Details off automatically turns this one off.
When the permission is off, the SSN column is hidden on screen and left out of downloads.
Unlike the masked entry field, the report shows the full, unmasked SSN — so grant this permission carefully!
Staff SSNs are entered the same way from Manage Users --> Add/Edit User, with the same masking and eye-icon behavior. Keeping staff SSNs and client identifiers complete also helps prevent EVV rejections.
Was this article helpful?
That’s Great!
Thank you for your feedback
Sorry! We couldn't be helpful
Thank you for your feedback
Feedback sent
We appreciate your effort and will try to fix the article