Sometimes a clinic may find the need to set up a fee schedule specifically for clients who do not bill insurance. For example, some clients may pay out of pocket for all expenses, and are billed a separate rate for this. We call these clients “Self Pay” or “Private Pay” clients. The guide below will walk you through the process of setting up a fee schedule for this kind of client.
Setting up a self-pay or private pay option in Theralytics requires a small workaround. Because Theralytics is inherently built around traditional insurance workflows, we treat the private pay option as a "pseudo-insurer." Follow these steps to configure your system correctly.
Step 1: Creating the Payer Profile
Create the Self-Pay Profile
Navigate to Manage Payer and create a new payer profile named "Self Pay" (or "Private Pay"). Set up the necessary fields based on the suggestions below:
Insurance Type can be set to “Other”
TPL code, Payer ID, and email can be left blank
Configure Payer Information
Disable EDI: Turn off the EDI payer option since you will not be submitting these claims electronically.

Address: Use your clinic’s physical address for the required address fields.
Leave the rest of the fields blank as well

Step 2: Financial & Authorization Setup
Define Contracted Rates & Auth Tracking
Set up your contracted rates for self-pay clients. You’ll also want to confirm if your clinic wants to track authorization hours for your private pay clients. If they do, make sure to check the “Required Authorization” box
Choose the service codes to indicate which services you will be conducting for self pay clients.
Payer Service Codes is where you set the contracted rates for these services. Since these are self pay clients, you’ll likely just enter your billing rates here.

Establish Billing Rates
Under Payer Activities, you’ll select the Appointment Types and assign service codes to them so you can schedule these services. Make sure to also set the billing rate for your private pay clients here
Make sure to also choose the Session Note Types that you would like to use when staff members conduct sessions for your private pay clients

Assign Payer to the Client
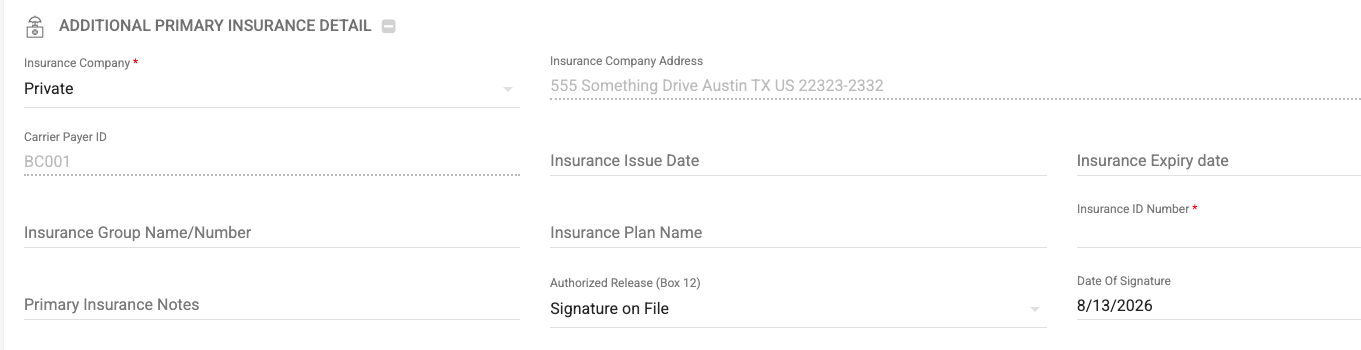
Go to the specific client's profile, navigate to the Insurance Tab, and add your newly created "Self Pay" payer.
If the client does not have an insurance ID, then you can include a single space in that field
The "Blank Authorization" Trick
If you decide to track authorized hours in Step 2, you must bypass Theralytics’ requirement for an authorization number. Create a new authorization and enter a single space in the authorization number field.
If you did not use the “Required Authorization” checkbox when setting the contracted rates (under Payer Service Codes) then you do not need to add an authorization
Step 3: Scheduling, Rendering, and Billing
Schedule and Render
Book and render appointments as usual. The workflow for your providers on the schedule remains identical to insurance-backed clients.
"Submit" the Claim
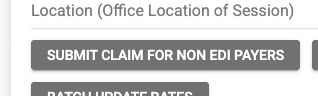
When it is time to generate invoices/claims, do not use the Batch EDI Generation button. Instead, select the Submit Claim For Non-EDI Payers button.
This moves the claims to the Submitted Claims tab, without sending the claim to your clearinghouse.
Once the claim is fully paid, it will automatically move to Settled Claims.
Apply Payments Manually
The system will push these balances to an outstanding status for the client. To post a payment, go to Apply Payment and select the private pay option that you created as the Insurance company (remember, the Theralytics views this self-pay profile as a pseudo-insurer). Manually log the client's out-of-pocket payment here.
Special Considerations & Pro-Tips for ABA Clinics
Applied Behavior Analysis (ABA) clinics have unique operational hurdles—high service volumes, recurring authorization blocks, and utilization tracking. Keep these industry-specific tips in mind when using this framework:
Beware the Scheduling "Hard Stop"
Theralytics will completely block scheduling or rendering if a client doesn't have an active authorization on file. If your clinic doesn't strictly track self-pay hours, the blank authorization option is your best friend. It satisfies Theralytics' system requirements without forcing you to invent fake authorization numbers.
Keep Standard CPT Codes Intact
Even if a parent is paying out of pocket, always map your self-pay services to the standard ABA billing codes (e.g., 97153 for Direct Therapy, 97155 for Supervision). If the families request a Superbill (or any of the financial reports in Theralytics) or standard CMS-1500 form at the end of the month to seek independent reimbursement, it will make it much easier for you to generate these reports from your database. Keeping standard codes can save you some administrative backtracking.
Clear Utilization Tracking for Private Contracts
If a family has a private contract for a set number of hours (e.g., "10 hours of private behavior consultation per month"), we recommend setting this up as that client’s authorization. Enter the exact hours contracted so you can track utilization in your reports just like you would for an insurance payor. This prevents accidental over-servicing.
Separate Co-Pays from Pure Private Pay
Make sure your team understands the difference between a client who is entirely self-pay and a client who is paying a co-pay/deductible. The pseudo-insurer workflow detailed above is strictly for clients where no insurance company is involved for that specific service.
Was this article helpful?
That’s Great!
Thank you for your feedback
Sorry! We couldn't be helpful
Thank you for your feedback
Feedback sent
We appreciate your effort and will try to fix the article