The Manage Appointments screen now has additional filters — Location, Staff Name, and Client Name — so you can narrow a long appointment list down to exactly what you need.
Using the Filters
Go to Manage Appointments --> Manage Appointments tab.
Set any of the filters (all are optional):
Location — lists all of your locations.
Client Name — lists all active clients.
Staff Name — lists all active staff members.
Appointment Types — narrow by appointment type.
Click Filter to apply. The filters work together (AND), so the grid shows only the appointments that match every filter you've set.
Click Reset to clear the filters and return the grid to its default list.
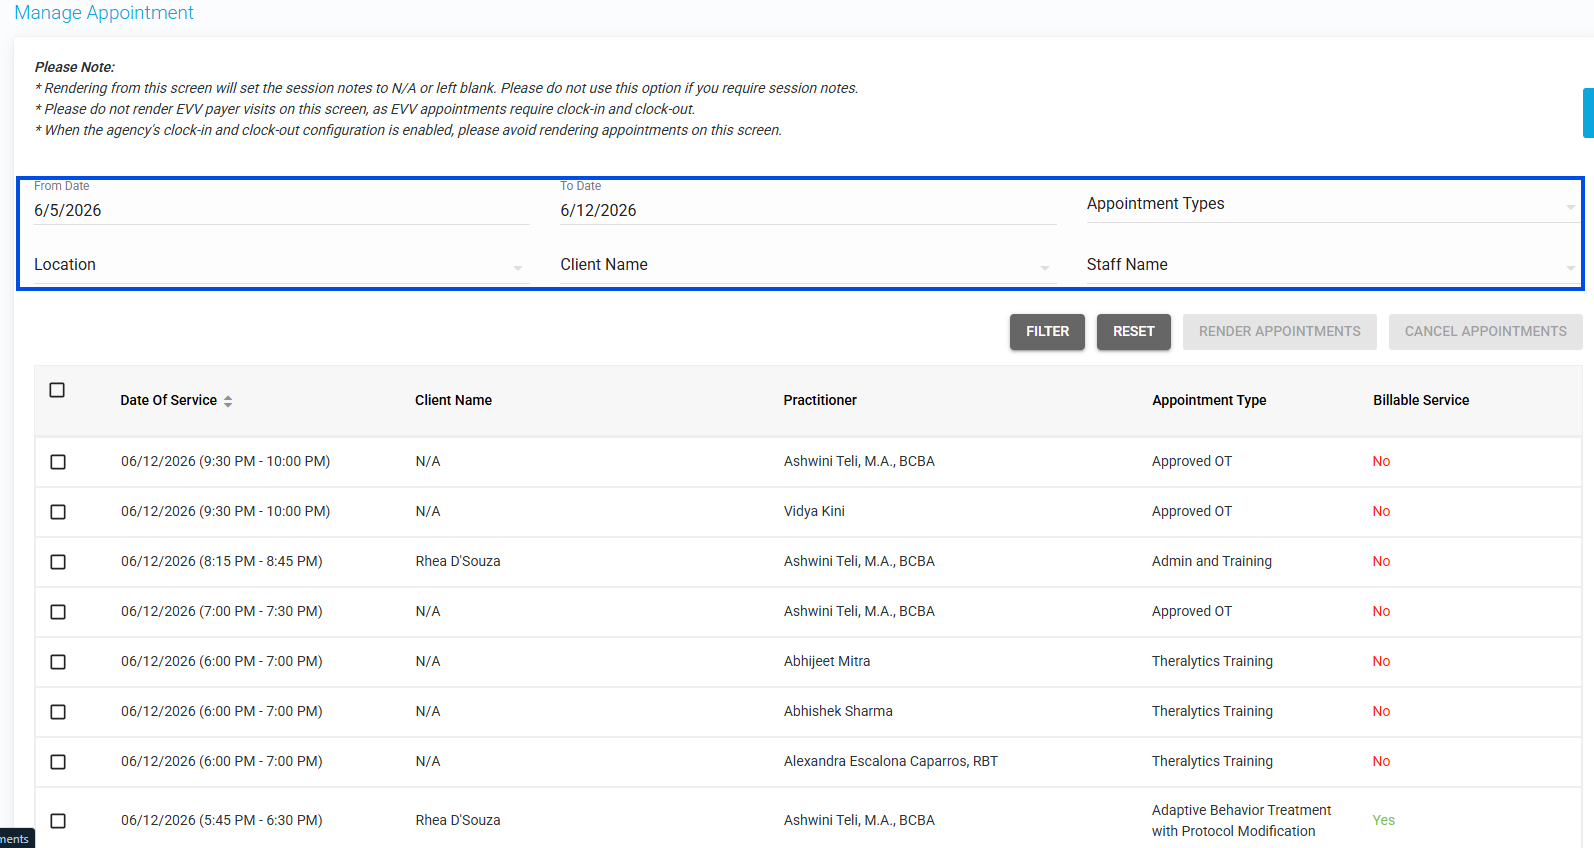
Picture 1: Manage Appointments tab with the Location, Client Name, and Staff Name filters
Notes:
The Client Name list respects the View Team Clients permission — when that's on, you'll only see the clients assigned to you.
All filter fields are optional; leave any of them blank to widen the results.
Was this article helpful?
That’s Great!
Thank you for your feedback
Sorry! We couldn't be helpful
Thank you for your feedback
Feedback sent
We appreciate your effort and will try to fix the article